Welcome to Tech Tuesday. Today we are going to dive into What Campaign Properties are in Contact Reach?
The campaign properties is where you can find additional not so common features to configure in your campaign.
Today we will go over all of those sections and what they can do for your campaign!
Step 1:
To view your campaign properties go to your regular campaigns list first.

Step 2:
In the action menu click on the properties menu.

Step 3: [ADDRESS INFO]
The address info is where you can add the business address of the campaign.
This is not a required field but it helps to identify the location of the campaign especially if the business has multiple branches.

Step 4: [SHORTENER]
By default all campaigns will use a shortener that is selected in the settings of the account.
However if you want to override that default choice in your campaign you can do that here.
Bit.ly and rebrand.ly uses an API to integrate, you will have to add the API keys in the settings to be able to choose a shortener.
If no API is set in the settings then URLs will not be shortened and will use the regular links.

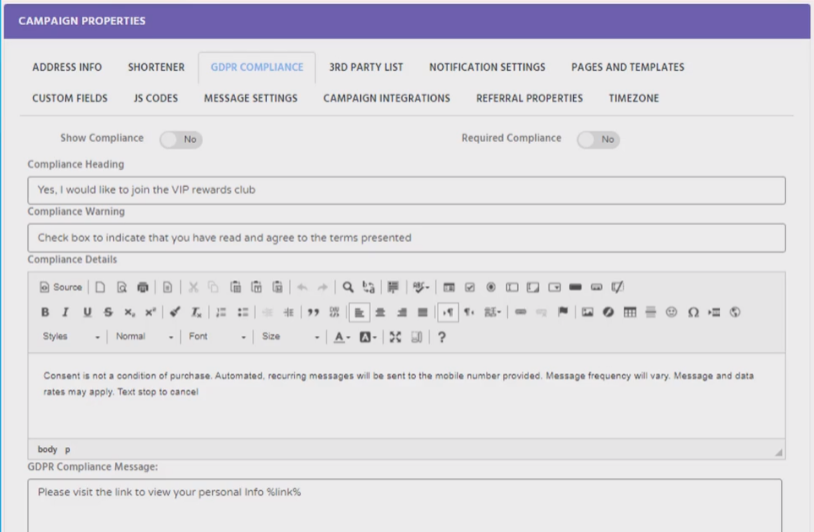
Step 5: [GDPR COMPLIANCE]
The GDPR Compliance tab is disabled by default.
You can enable it be using the switch.
A pre made compliance message is already created for you – which you can customize accordingly.
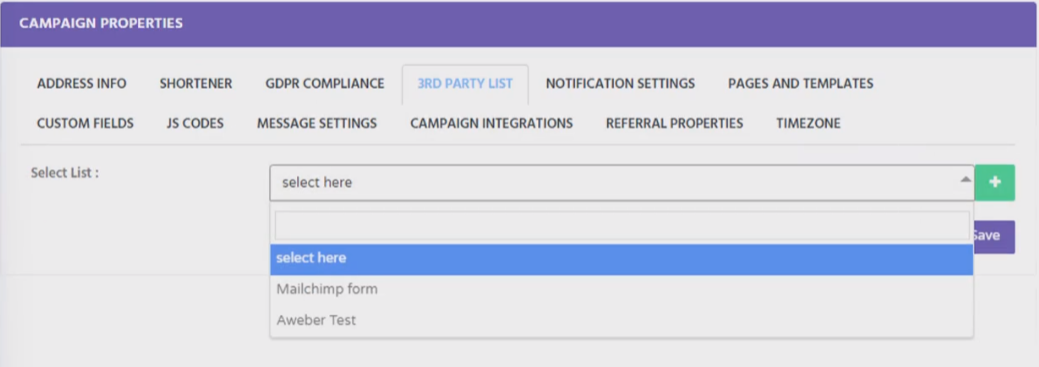
Step 6: [3RD PARTY LIST]
The 3rd party list is your auto responder that you would use to forward subscribers from contact reach.
Set up is required in your account settings to show the list in this tab.
Step 7: [NOTIFICATION SETTINGS]
The notification settings is used to receive notifications when their is a new subscriber SMS and API lead notification will send a notification if someone has subscribed to the campaign via text keyword.
Full lead notification will send a notification if someone has subscribed to the campaign via webform.
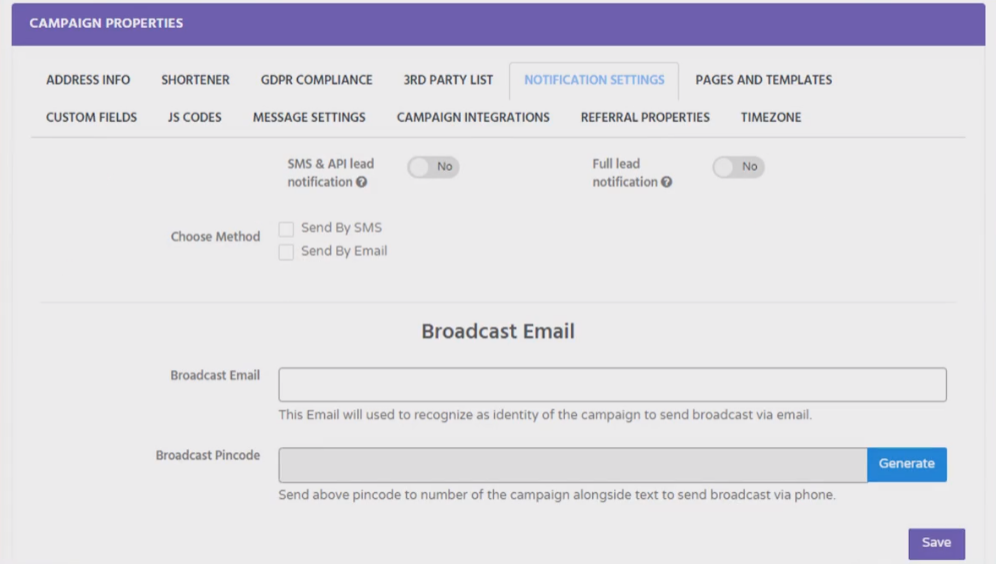
Notifications can be set through both SMS and email.
The Lead Notification Phone will send a SMS for New Subscribers
While the Inbox notification phone will send an SMS if a subscriber is sent a message to the campaign phone number .
The phone merge tag in the inbox notification phone will be replaced by the phone number of the sender.
And the message merge tag will show the message.
The chat link merge tag will be replaced by a link which redirects to a chat page to directly send an sms to the subscriber

The email notifications work similarly with the SMS notification – the message will be through email.
Lead notification Email will send an email for new subscribers while inbox notification email will send an email if a subscriber sends a message to the campaign number.

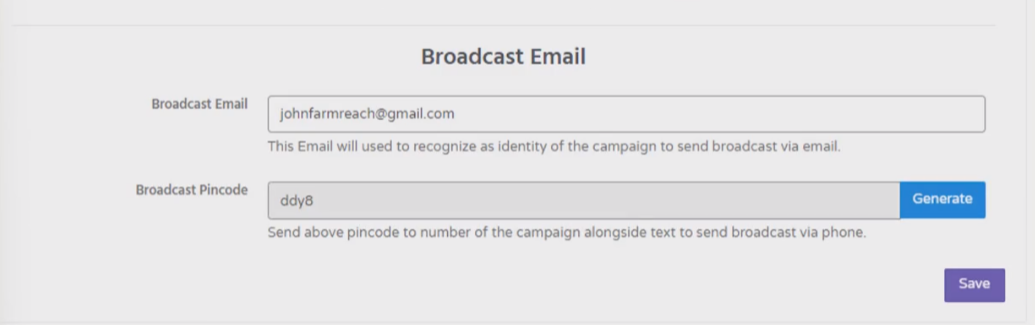
The broadcast email will allow you to send a broadcast message without going to your contact reach account.
Enter any email address in the Boradcast email section. The email you entered will be the email use dto send the broadcasts message.
Then click on the generate button to generate a broadcast pincode.
The pincode will be used to send a broadcast message via phone
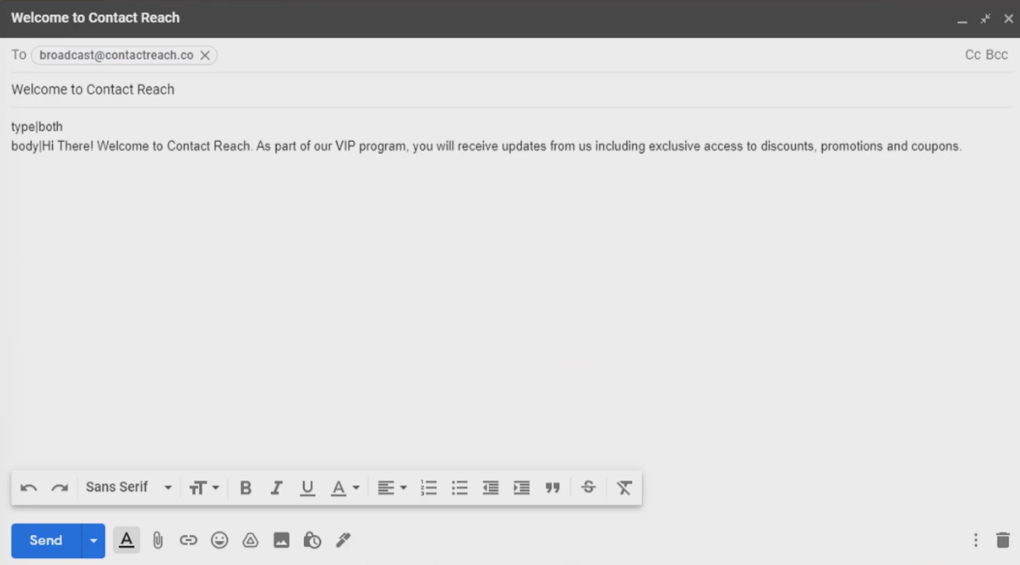
To send an email broadcast message. Open the email account you have added in the broadcast email field. Send the message to broadcast@contactreach.co This is the only email you can send the broadcast message. The subject line can be anything
The type is a requirement and you can only choose from SMS, EMail or both.
The body is also required as it helps the system determine which part of the email is the message
To send a broadcast message via phone SMS enter the campaign number as the recipient.
Then add the pincode you have generated followed by a space and then the broadcast message.

Step 8: [PAGES AND TEMPLATES]
The pages and templates section is where you can find the pages that came with your template.
If you have imported a template this page will show the coupon pages, form thank you page, coupon thank you page and email templates that came with the template.
For manually created campaigns it will not show the pages & email templates in here since the pages and email templates can be changed right away and the system will not be able to track it.

Step 9: [CUSTOM FIELDS]
Custom fields is used to add fields to a form on top of the default ones. Their are two types of fields that can be used.
Custom fields & Global Custom Fields .
The custom fields is campaign only field.
This means the custom field you generate here is only applicable for the campaign.
The global custom field are fields that can be used across all campaigns.

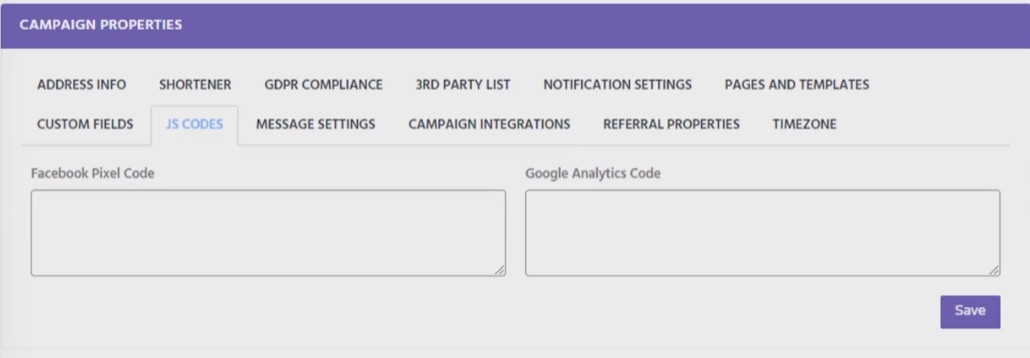
Step 10: [JS CODES]
JS Codes is where you can add your facebook pixel code and google analytics code. Once the code is added it will track the submissions done in your campaign form.
Step 11: [MESSAGE SETTINGS]
Message Settings are control options on the auto responder, birthday and anniversary messages.
You can stop the autoresponder messages after the subscriber has redeemed the coupon by enabling this switch.

Step 12: [CAMPAIGN INTEGRATIONS]
Campaign Integrations is where you can link contest and survey campaigns in your regular campaign the contest and survey campaigns will trigger after the subscriber has filled out the campaign form.
If both are selected in this area then the subscriber will automatically join the contest after filling out the regular campaign form and will also receive the survey welcome message.

Step 13: [REFERRAL PROPERTIES]
Referral Properties is a reward type feature of contact reach campaigns.
Subscribers can get points which can turn into rewards whenever someone subscribes to the campaign using their referral link that they shared through Fb or something similar.

Step 14: [TIMEZONE]
Lastly is the Timezone section.
By default campaigns will use a timezone set in the account settings this can be changed per campaign in this section.
The timezone is responsible for the timing of the message schedule in your campaign.

You now know about all of the campaign properties!
We hope this tutorial has given you all the insight you need and if you need any assistance during this process please reach out to our support team HERE.
*Please allow 24-48 hrs for response time