Welcome to Tech Tuesday. Today we are going to dive into Birthday/Anniversary Campaign Properties in Coupon Reach.
The campaign properties is where you find additional features for your campaign that are usually optional or a little more advanced.
Things that you don’t necessarily have to tweak but you can tweak to improve your campaign.
Let’s dive into these campaign properties.
STEP 1: [PROPERTY SETTINGS]
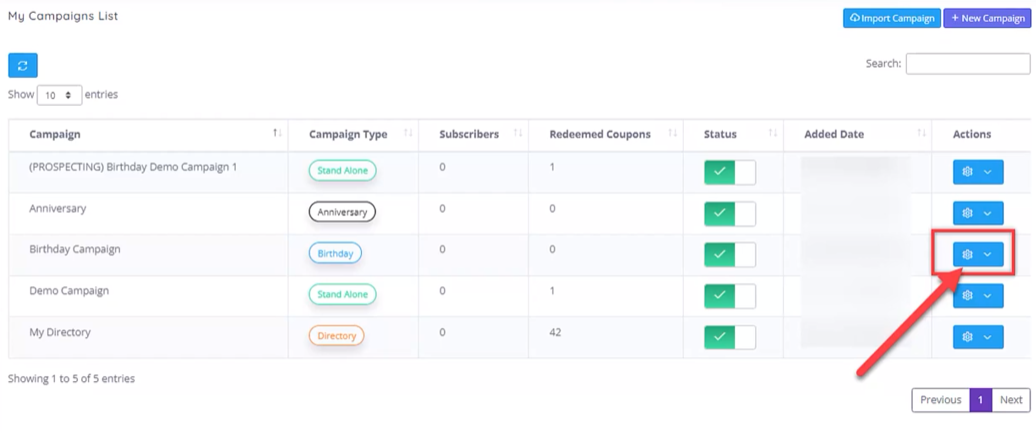
To get there, you just click on the action dropdown of your birthday anniversary campaign and then click on the properties menu.

STEP 2: [BIRTHDAY SETTINGS]
The rest of the menus here are similar to a standalone and also a directory campaign.
The only difference is the birthday settings.

STEP 3: [ANNIVERSARY SETTINGS]
Note if you’re accessing an anniversary campaign properties, then it will also say anniversary settings.
The birthday settings have three sub menus.
Offer settings, customized buttons and custom warnings.

STEP 4: [ENABLE DOMAIN]
Under offer settings, submenu, you can use the enabled domain switch if you want to use a custom domain for the campaign’s URLs, this is similar to the one we had in the directory campaign properties.
There is also a separate tutorial in setting up a custom domain.

STEP 5: [ENABLE OFFERS GATE]
The offers gate switch is used to control if you wanna show the birthday offers first or the form first when accessed via your custom domain.
This feature is only applicable if you have enabled the custom domain switch.
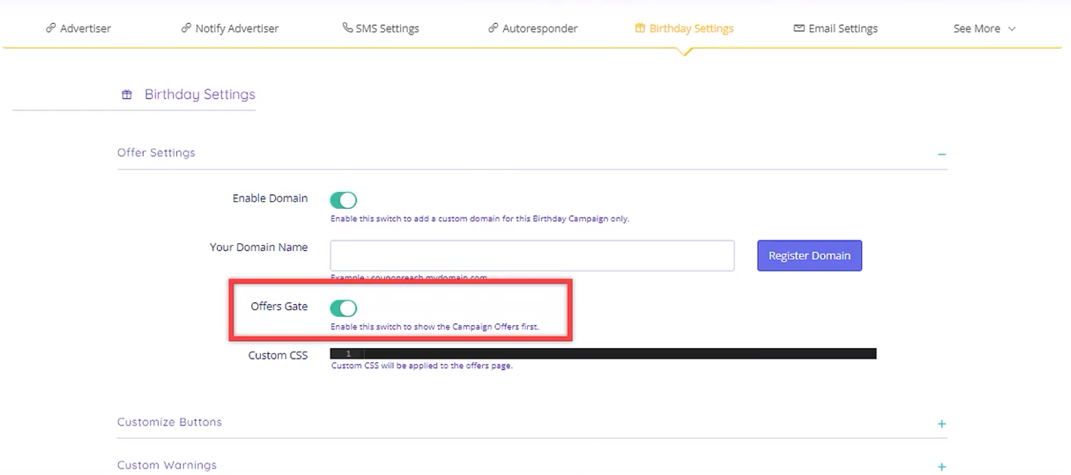
STEP 6: [CUSTOM CSS]
Custom CSS is also available if you want to add custom CSS code.
This will get applied to the offers page of your birthday or anniversary campaign.

STEP 7: [CUSTOMIZE BUTTON]
The customized button section will allow you to rename the buttons in the offers page and also change its font color, font size, and button color.

Each customizable button has a help image to show you where the customizations will go.

STEP 8: [CUSTOM WARNINGS]
Lastly is the custom warnings where you can customize the alerts and warnings in the offers page.

STEP 9: [CLAIM OFFER PROMPT]
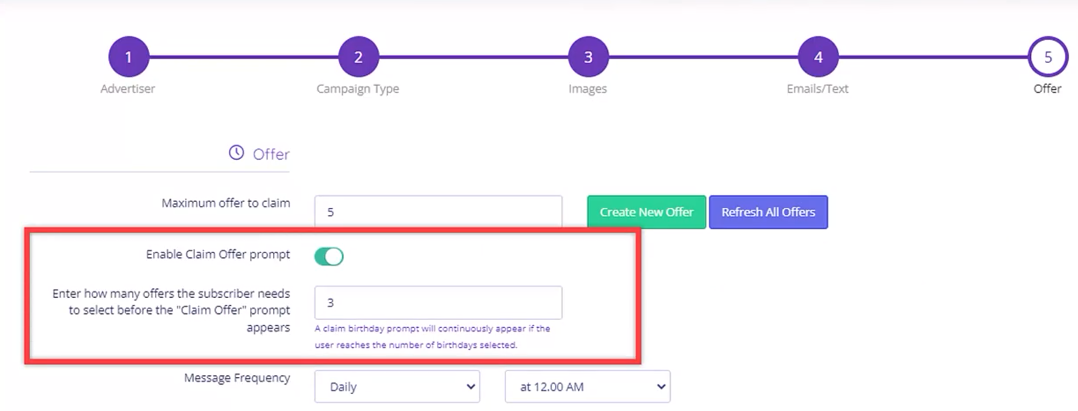
The claim offer prompt is where you can customize the alert when a subscriber claims a certain number of offers.

This alert will show when you enable the claim offer prompt switch in step five of the birthday campaign.
This is an example of the claim offer prompt.

STEP 10: [NO OFFER SELECTED PROMPT]
The no offer selected prompt will show when the subscriber tries to submit the birthday offers without selecting any offer.
The limit merge tag in here will be replaced by the number of maximum offers that the subscriber can select.

This is an example of the no offer selected prompt when triggered.

STEP 11: [OFFER LIMIT EXCEEDED PROMPT]
And then lastly, the offer limit exceeded prompt.
This will alert the subscriber if they have chosen more than the maximum offer set.
The limit merge tag in here will be replaced by the number of maximum offers at the subscriber can select.
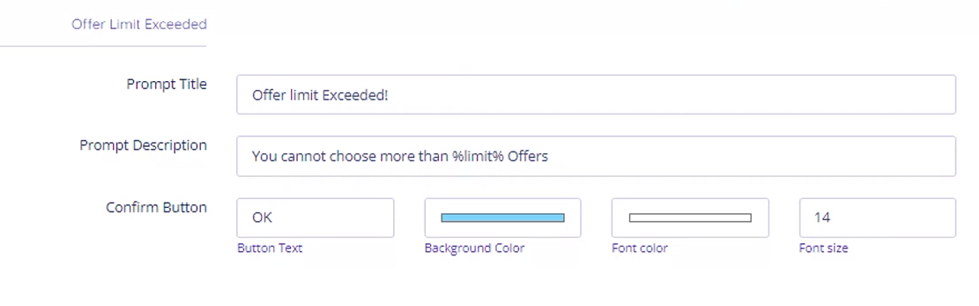
This is an example of the offer limit exceeded prompt.

Now you know the properties of Birthday/ Anniversary Campaigns in Coupon Reach.
We hope this tutorial has given you all the insight you need and if you need any assistance during this process please reach out to our support team HERE.
*Please allow 24-48 hrs for response time
Want Coupon Reach?
If you don’t already have it, but you want to check it out to see it’s full power, so you can Build Unlimited Digital Coupon campaigns to get paid from local businesses, then click below: