Welcome to Tech Tuesday. Today we are going to dive into How to Use the Lead Module in Prospect Reach.
The leads module is a feature inside of prospect reach software.
This is a lead scraping tool that can in finding businesses in a certain city or state that may be looking for your services.
Lets get into how to access this tool and use it!
Step 1:
To start click on the “Leads” module in your prospect reach account.

Step 2:
You will then be directed to the leads search section.
This is where you can conduct searches to find any business or niche that you need.

Step 3:
Also on this page you will find your leads statistics.
This is where you will find your available credits to your lead search.
The stats you see in your account are based on the package you are subscribed to – so it may look different.

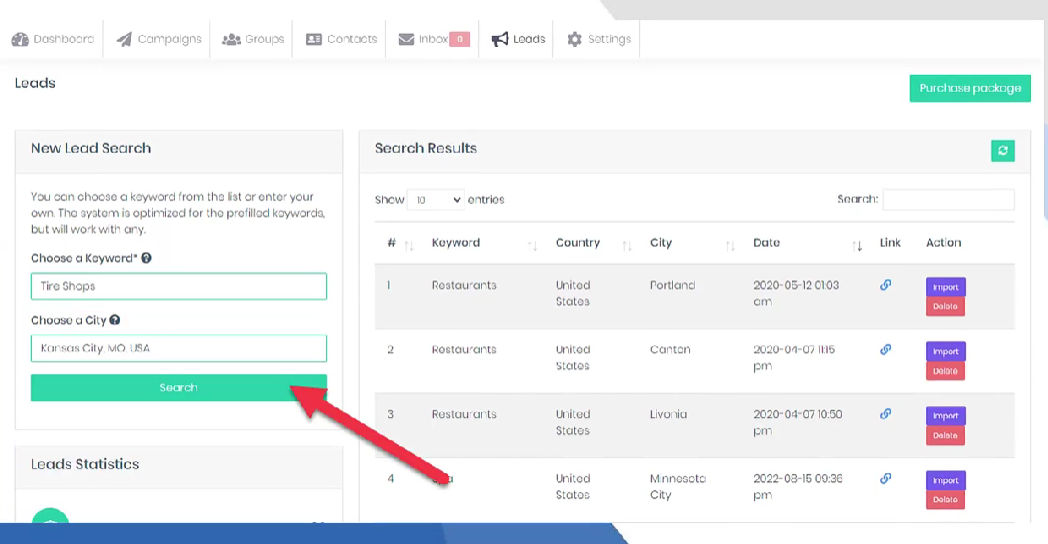
Step 4:
The new lead search area is where you can input the type of business and the city that you want to run the search in.

Step 5:
You are free to enter any key word here but for better results consider choosing the lists of results.
In this example we will use “Tire Shops”.

Step 6:
To search for a city enter the city name and you will be given a list of possible matches.
you may then choose your preferred city and state.

Step 7:
Click on the “Search” button to run the search.
Step 8:
A confirmation will show upon a successful search.

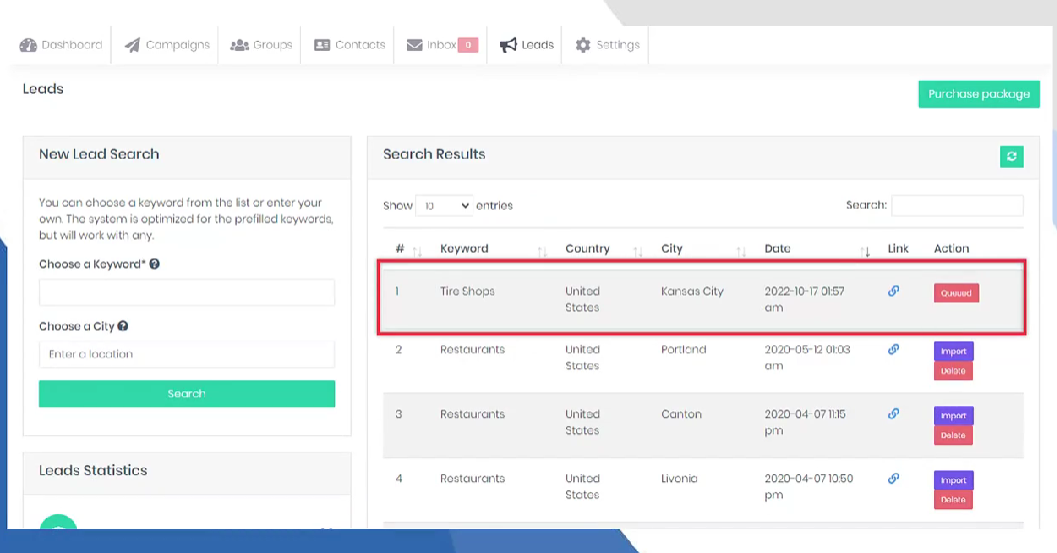
Step 9:
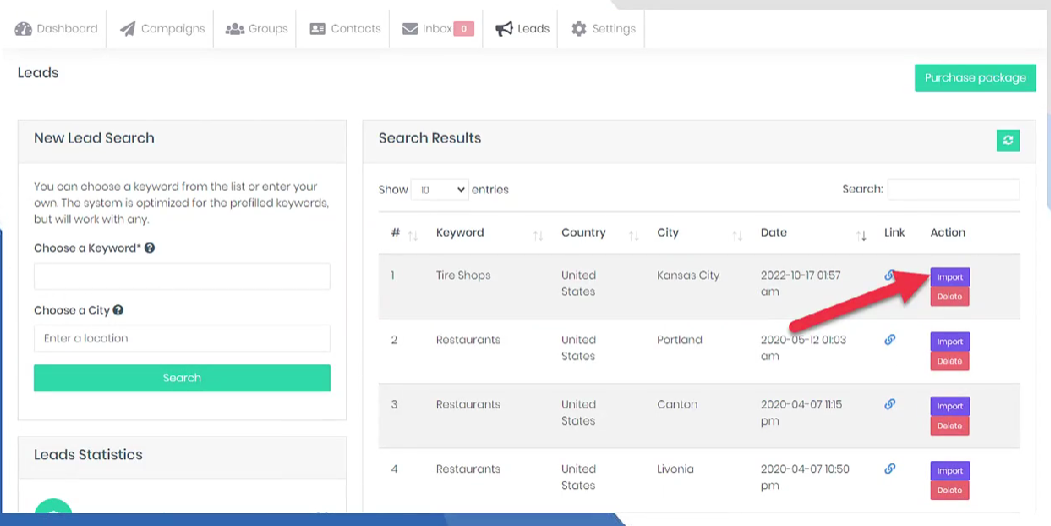
Your lead result will be at the top of your search results and will be in “queued” status.
This means that the system is still generating the leads that you searched.
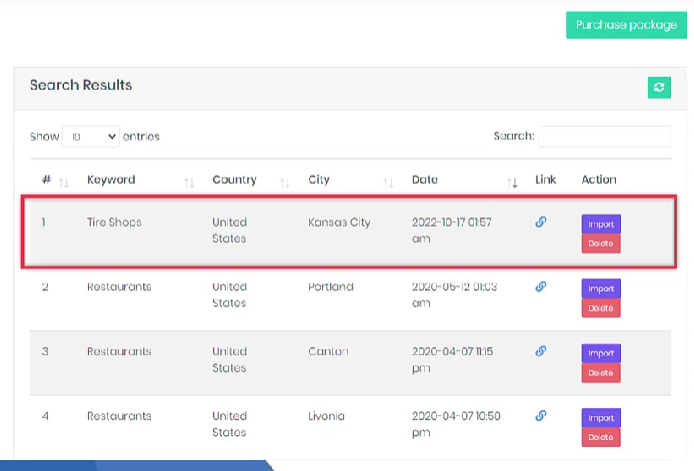
Step 10:
Once the system has completed your search for leads it will show the buttons “import” and “delete”.
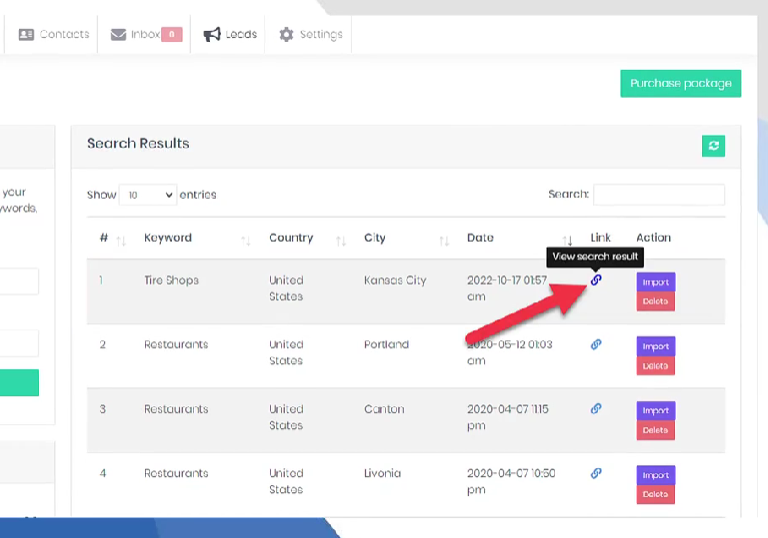
Step 11:
To view your leads click the “link” icon.
Step 12:
You will then see list of your leads with their information (phone number, email, website, etc.)
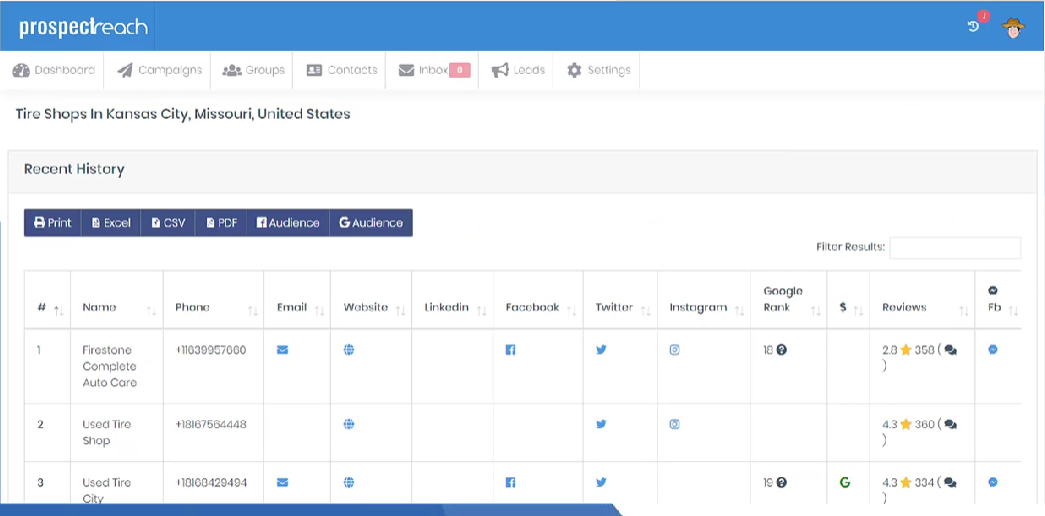
Step 13:
At the top of this page you can find the options to choose from to export your list.
Print, download via excel, download as a CSV or pdf , download based off of their Facebook details or google ratings.

Step 14:
To import your leads directly into your prospect reach account click on the “import” button
Step 15:
Choose the group to house your leads or create a new group by clicking the “+New Group” button.
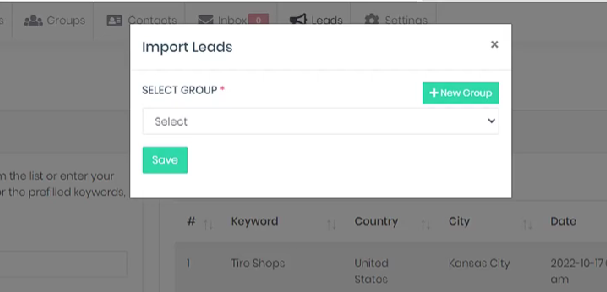
Step 16:
You will then add a group name and click “save”

Step 17:
A success confirmation will appear.
It will also tell you that the leads emails are being verified, which may take some time to complete.
This ensures that all the leads emails are valid.

Step 18:
To check your newly imported leads go to the “groups” tab in your software.

Step 19:
You may have lots of groups in your account so you can use the search bar to find it.

Step 20:
Click on the “number of prospects” to see the list of contacts.

Step 21:
From here you can see the complete list of your leads.
You may now start creating your campaigns and send an email to your leads and start prospecting.

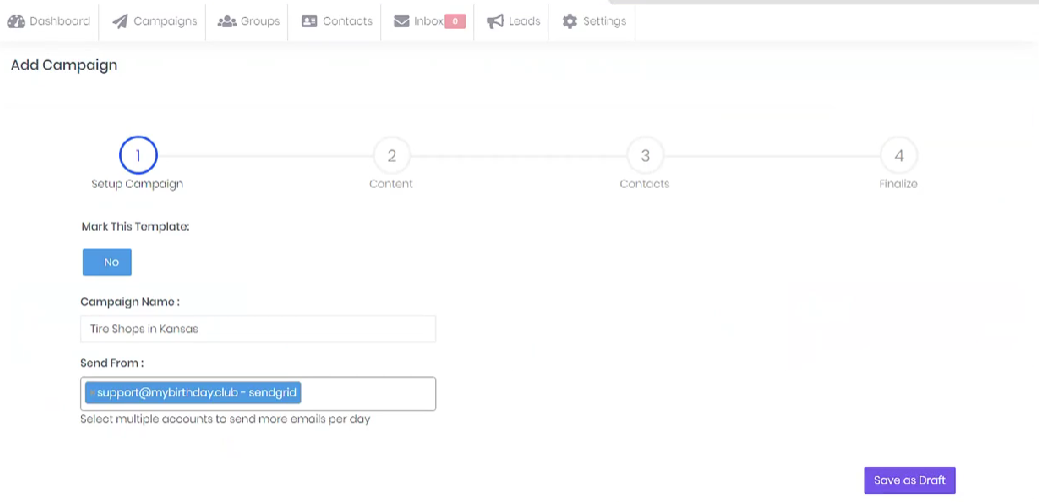
Step 22:
To start a campaign select the “+Create New Campaign” button

Step 23:
You will be directed to the 4 step set up wizard.
Step 1-Setup the campaign (name, email)
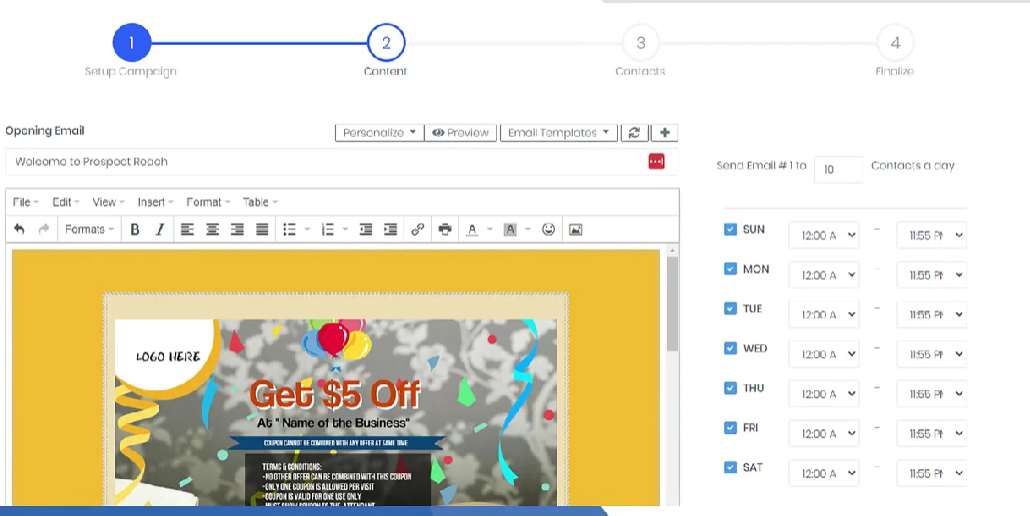
Step 2 – Create the content for your email (dates and times to send)
Step 3 – Select the group you want to add to your campaign
*This is where you will add the group we created from the lead module.
Step 4 – Finalize your campaign and send!


You now know how to utilize the lead module!
We hope this tutorial has given you all the insight you need and if you need any assistance during this process please reach out to our support team HERE.
*Please allow 24-48 hrs for response time
Want Prospect Reach?
If you don’t already have it, but you want to check it out to see it’s full power, so you can land clients faster then click below